This is a super simple craft that makes for an adorable gift for both book and electronic readers! You almost don't even need a tutorial but I took the pictures so you're going to get one anyway ;)
Supplies:
Elastic
Felt
Hot glue gun
Scissors
Measure the circumference of your book or electronic reader and subtract an inch. Cut your elastic to that measurement.
Stitch the elastic together to make a circle and set aside.
Trace 8 circles about 2 inches in diameter onto felt and cut out.
Cut 7 of the circles in half.
Line up the half circles overlapping them about halfway.
Sew them together with a long running stitch.
Pull on the thread to gather the felt and knot off, but don't snip the thread.
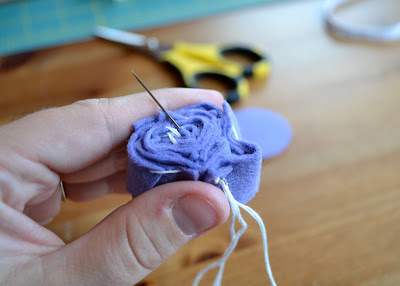
Roll it up like a little sleeping bag. This is what the backside will look like.
Take your needle and go from the outside of the flower to the center working your way around the circle like wheel spokes. Knot and snip thread.
It doesn't look pretty.
But the top does!
Cut two leaf shapes out of felt and hot glue them together. Glue the flower on top.
Take your circle of felt and hot glue it to the elastic.
Glue your flower on top of the felt circle base, sandwiching the elastic. You're done! Easy peasy and you could even rock it as a cute headband ;)
A perfect little gift!
Earlier this month I taught a similar craft at the women's group in our church. That time we layered felt with buttons and extra trimmings to make this cute version. This is one my sister-in-law made and she uses it on her Kindle. The options are endless when it comes to these!
Happy Crafting!


Very pretty ko and something I think even I can sew!
ReplyDeleteHave a great Tuesday!
So clever and I love how it looks all put together. You are very talented :)
ReplyDeleteYou make everything look so easy Ko!!! This craft would probably take me an entire weekend...and still not look as crisp as yours :)
ReplyDeleteThese are sooo cute!! Love the flower and thanks for showing us how to make one!!
ReplyDeleteSooo cute! I need to keep this idea in mind for the holidays!
ReplyDelete