Supplies:
*Colorful scrap fabric
*At least 1/4 yard of neutral fabric (more depending on how long you would like your bunting to be)
*1 pack of Heat-n-Bond Ultra Hold (if you want to do any decorative stitching along the edges of the letters get the light purple pack instead)
*Double Fold Bias Tape
Print your letters out on card stock. I used the font Arial Narrow and the size 288. Although I recommend 280. Then using a ruler figure out how big you want each pennant to be. Mine ended up being 6 inches wide at the top and 6 1/2 inches long. Cut the card stock to make your templet.
Using the template cut the amount of triangles you'll need from the neutral fabric.
Cut out your letters from the card stock.
Take your printed fabric and decide which way you want your letters to go. In my opinion it looks better when the fabric on the letters are all going the same direction.
Following the instructions on the Heat-n-Bond packaging, iron on the paper to the back of your printed fabric.
While the printed fabric is cooling. Use a 1/4 inch foot and stitch down the long sides of each triangle. This will allow for a frayed look but stop the fray from getting out of control.
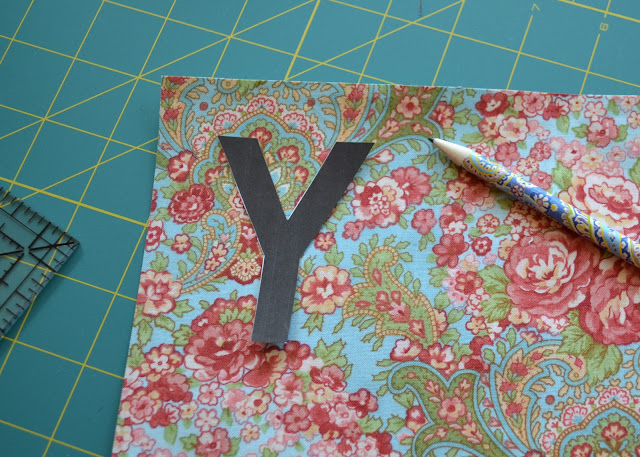
Trace your letters with a chalk pen (I couldn't find mine so I used a pencil). Then cut out the letters.Peel off the back paper and iron on, again following the package instructions for the Heat-n-Bond. If you used the light purple package of Heat-n-Bond, here is where you would do your zig-zag or decorative stitch on the edge of the letters.
Sandwich each triangle between the bias tape and pin. I left about an inch between each letter pennant.
Sew down the bias tape with a decorative stitch and your done!
A fun and simple way to brighten up any space! I was able to do this little one in under an hour and that was with taking pictures and keeping tabs the boys! Not too bad! Later that afternoon I got started on this one for Easter:
Did you see that the April Giveaway is hanging in my entryway??? Go make it yours!
***Update***
Now that I have corrected my Mom on "bunting" she thought "YAY" was not a word, haha! It is slang but it is a word just in case anyone else was thinking "this poor girl". It was also a throw back to the Grey's Anatomy when they wrote "YAY" on Zola's birthday cake. I thought it was cute, plus I say it to my kids many times during the day. So there you go :) Yay!


Hey Kristen this is Aisling ... Question from a not so crafty mom... Would you ever consider making and selling a custom banner? Thank you for you time hope all is well
ReplyDeleteLOVE LOVE LOVE this! I am a little jealous of your amazing talent...I have been looking for a cute "He is Risen" banner and couldn't find one. Please post pictures of your final banner (or send me a text) b/c I would LOVE to see it! Such a great idea!
ReplyDeleteAisling! Yes I would love to do a banner for you :) Email me at domesticdoozie@gmail.com and we can iron out all the details!
ReplyDeleteSteph, I'll be sure to post my Easter bunting and it's probably going to go up for sale in my shop after Sunday ;) I found a different fabric for next year already!
I know you were featuring the "YAY" in your finished product photo (which BTW is super cute), but I must say, I love what you did to the mirror/coat rack!!! Love the saying on it!!!
ReplyDeleteI just got the banners and they are beautiful exactly what I wanted can't wait to give the others as gifts thank you so much xoxo
ReplyDelete